
Figuring it out, one kitchen disaster at a time

Sourdough Starter
When my parents were growing up, they took shop classes and home-ec. From spice racks to pillows, I can list dozens of basic DIY projects I don’t know how to complete, but that doesn’t mean I can’t figure it out with the help of youtube, pinterest, and a helpful book.
First on my list is learning how to become a proper baker. There’s no contest between supermarket baked goods and homemade breads and pastries. Its amazing the flavor and nutrients that are lost in mass-production.
I’ve had some success with a countertop breadmaker (holla for the challah!), but I hate being dependent on that bulky machine. I want to get my hands in the flour and make REAL FOOD – and that means sourdough, and nothing less than sourdough will do!
Fermenting flour and water is how people have been baking bread for hundreds of years. Think of all those live cultures adding flavor and texture to your food – its like kombucha for your cupboard.
Some bakers believe fermenting flour is the key to making grains more digestible, especially for people sensitive to gluten. I’m not sure about the science behind that, but I’m all for tasty, crusty bread – and doing what I can to limit gastro-intestinal distress!
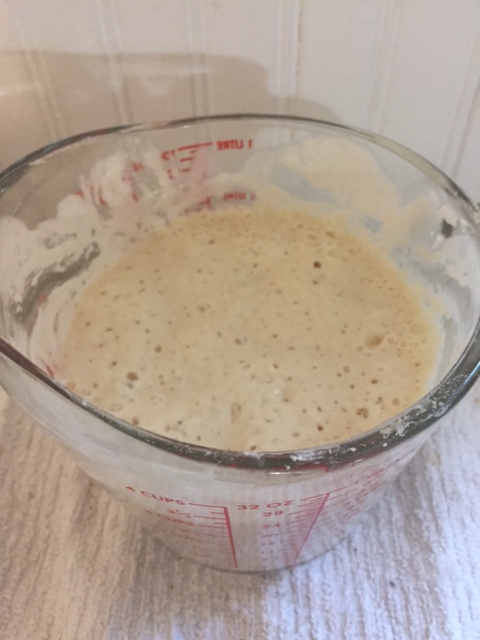
So of course the first task to making tasty bread is to get some sourdough starter cooking! In this case, I’m deferring to the experts: King Arthur Flour. People use all sorts of crazy things to get their starter going (grape juice?), but their recipe is straightforward, simple, and keeps the ingredients to a minimum.
It will take a few days to get your starter going, so be patient, and plan ahead.
- Day One: Take a cup of flour (rye or whole wheat is best, as its less processed and can feed wild yeasts best) and a half cup of cool water, mix, cover loosely, and let sit 24 hours.
- Day Two: After 24 hours, throw away half your starter (WHHHHAAAT? NOOOOOOO! Don’t worry, we’ll work on recipes for your discarded starter) and repeat what you did yesterday: add a cup of flour (all purpose is fine in this case) and half a cup of water. You might be seeing a few bubbles and smelling a bit of tang, but don’t worry if you don’t see much action yet.
- Day Three: You guessed it, throw away half your starter, add a cup of flour and a half cup of water, mix, cover, and set aside. By now, you should start seeing some activity. Here’s where things change: You’re going to start twice daily feedings! Every 12 hours, repeat your discard, add, mix, cover, and rest system.
- Keep this going for another two days AT LEAST until you notice your starter doubling in volume a few hours after feedings. This could happen on day 5, or day 10 – it all depends on the climate of your kitchen.
- Day XXXX – now you can start USING your starter instead of thowing it away. Take what you need for your recipe, but be sure to save half a cup to keep your starter going. Feed your starter, as per usual, wait an hour or so, and then put it away in your fridge. Now you just need to feed it once a week!
